hats patches

sufyan101

Sew A Patch On A Hat 

How To Sew A Patch On A Hat 

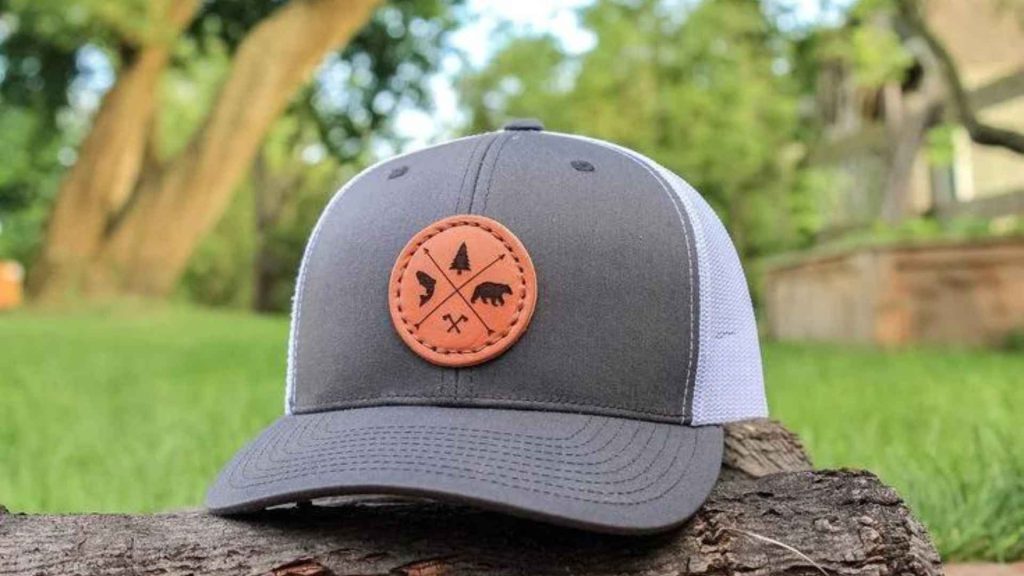
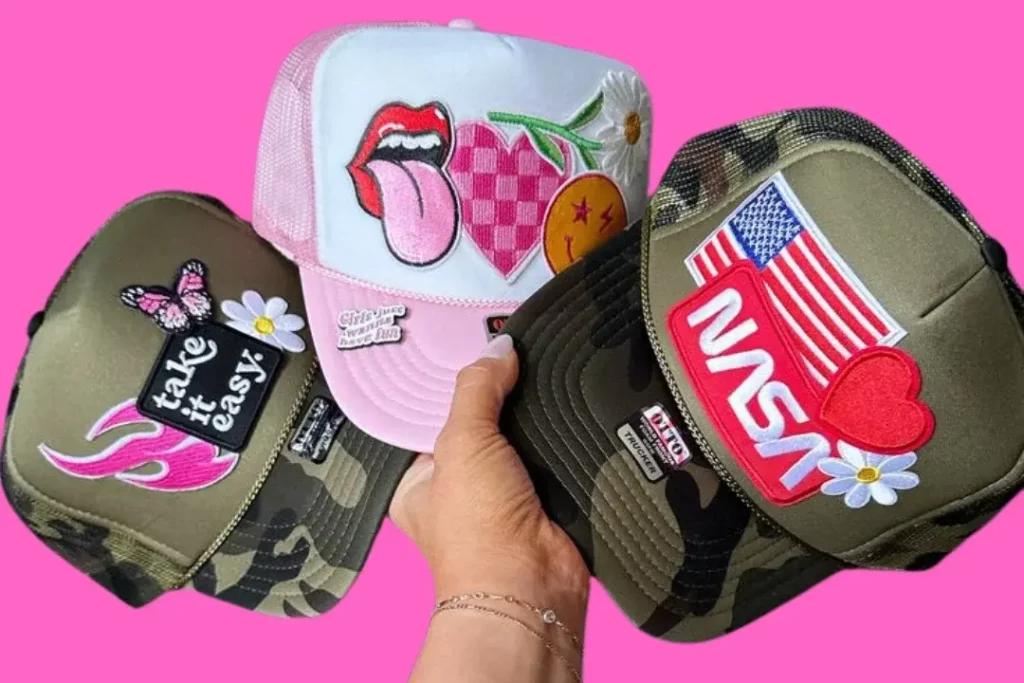
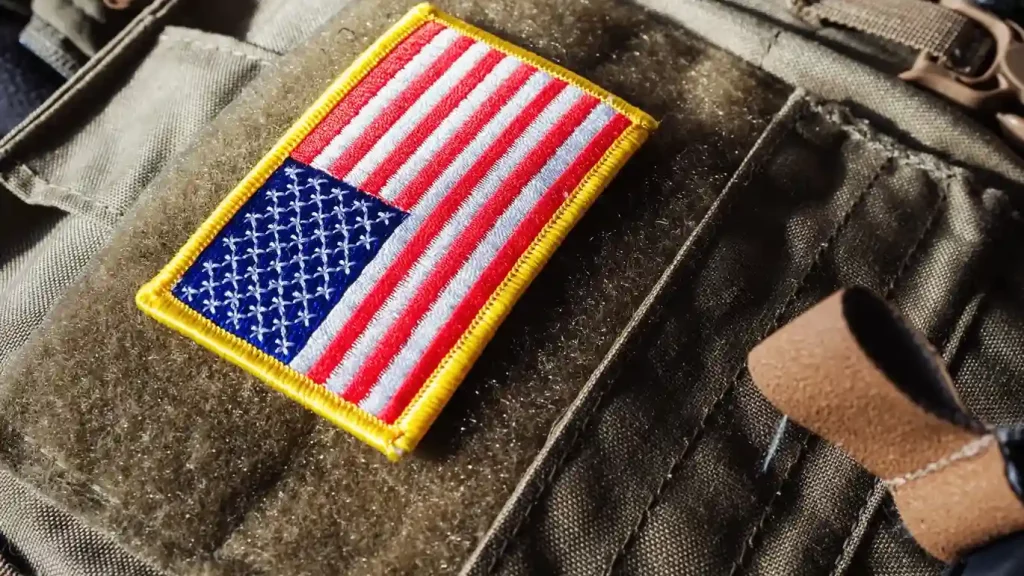
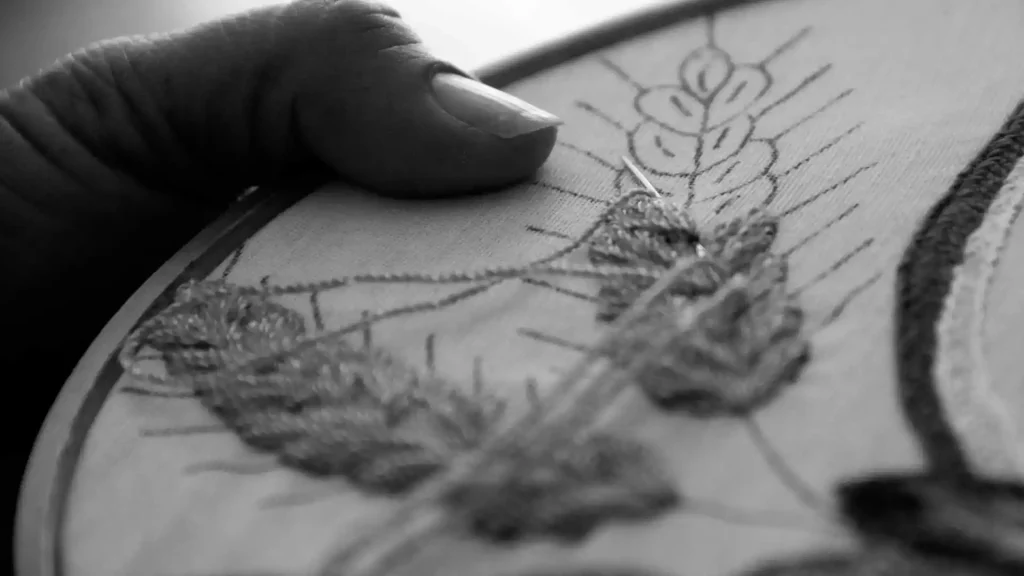
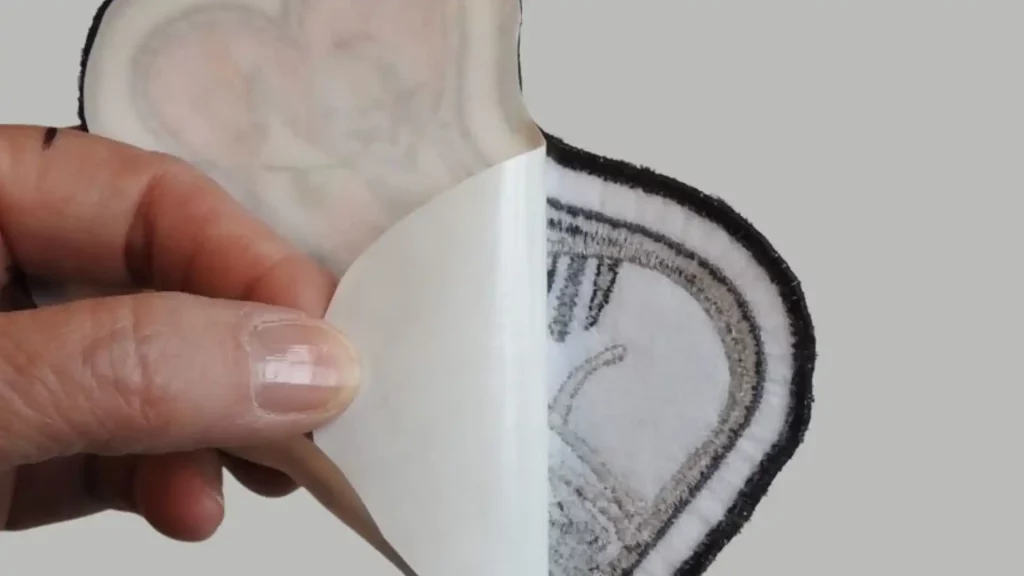
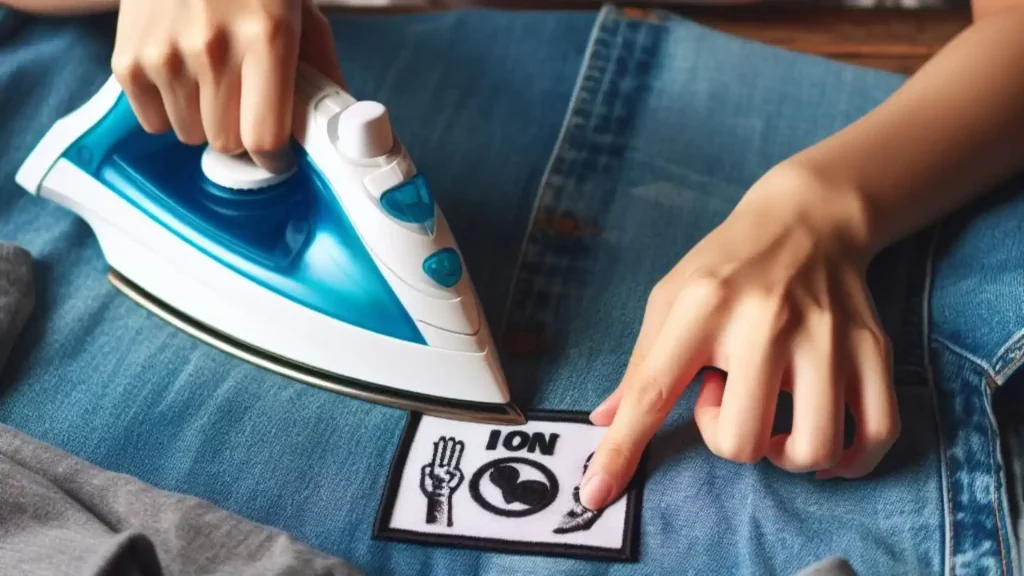
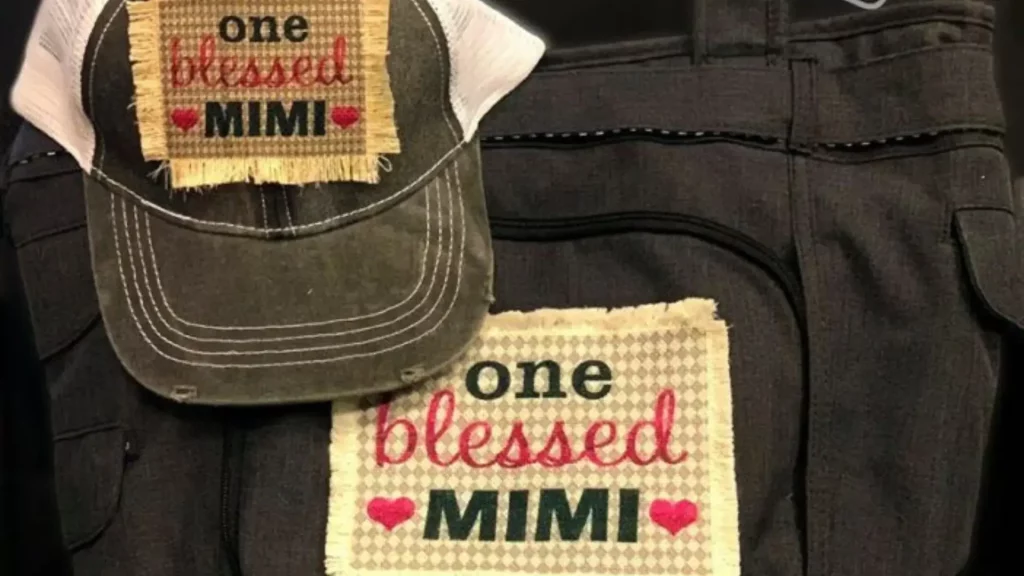
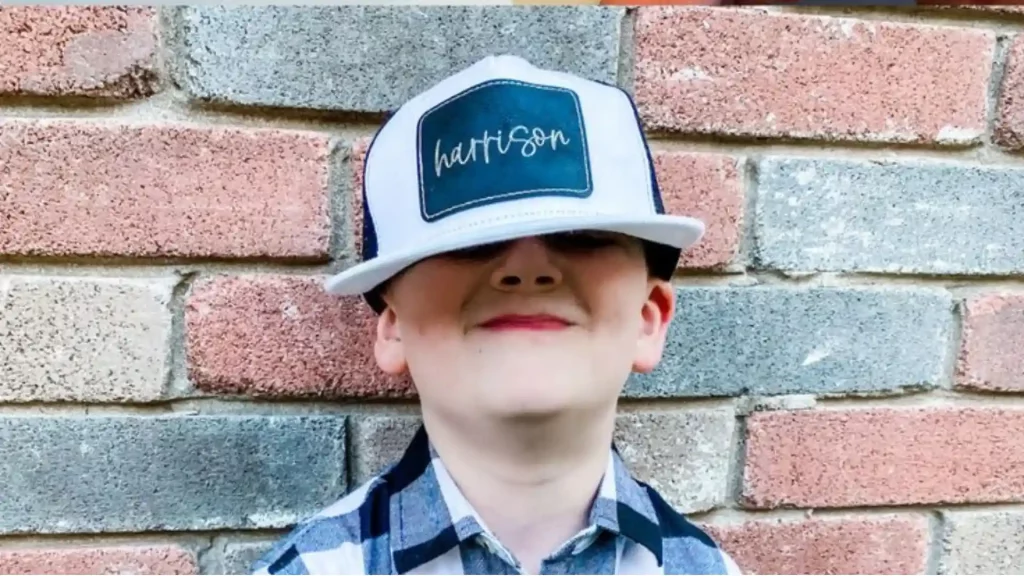
Learn how to sew a patch on a hat in this ultimate step-by-step blog! Replace It: A Beginner’s Guide for Sewing a Popular Hat Patch in Basic and Simple tasks! Are you thinking of customizing your #1 hat with a patch? There’s an opening or a developed spot you want to cover. Or, on the other hand, are you simply giving it that exceptional touch to make it entirely yours and reflect your style? Whatever the case, luck has smiled on you since this blog will provide a thorough way to deal with effortlessly adding patches to hats. As you explore the patch world, prepare to discover unique methods for how to sew a patch on a hat. Quick information in this blog How to Sew Patches on Hats Sewn patches are a great way to give your accessories, especially hats, personality and originality. Regardless of whether you are new to sewing, it’s easy to connect an intelligent custom patch to a hat with no difficulty at all. How to Sew an Embroidered Patch on a Hat After placing the patch in the desired location: Thread the Needle with the appropriate thread. Sew around the patch’s edges, going through the hat fabric and the patch. Tie the line, and you’re finished! What You Will Need for Sewing a Patch The most crucial phase in effectively patching your hat is picking the suitable materials. You’ll require this: Choose a Hat Pick a hat that you need to decorate with a patch. It may be a baseball cap, beanie, or some other kind of hat. Appropriate Patch for Your Hat Find a patch that affects you. You can explore online retailers like Hatspatches, Amazon, Etsy, or eBay or visit nearby art stores for a wide choice of patches. Thread and Needle Select a thread variety that increases the patch and the hat. Use a needle with a sharp point that can go through the hat’s surface. Scissors Keep some scissors handy to manage a great quantity of thread. Iron and Ironing Board These are important when using iron-on patches, and the right ironing board can make your undertaking much smoother and faster. Additionally, they help properly iron the patch and guarantee its fixed attachment to the hat. It keeps away from any last detail. Finding the Perfect Patch: How, Where, and What to Look For With regards to picking the perfect patch, think about these critical viewpoints: Buying Choices: Online stores make open-handed decisions about plans and shades of patches. However, you can also get a physical examination at your local craft store to ensure the piece is high quality and suitable for your hat. Material Considerations: Patches can be made of material, knitting, decorations, or leather. Your decision of material must align with your hat’s surface to give a suitable look. Suitable size: Patches should be the right size for your hat and the purpose you want to use them for. The patch should be more significant if it is used to cover a hole. If you’re adding it for style, consider the type you need to finish. Knowing the right size expects uncalled-for size and improves the external presentation. Appropriately Putting the Patch: With the proper placement, patching can provide a quick fix, a creative outlet, or a personality change to your hat. How it’s done: Why Patch Placement Matters? Some improper position could beat your hat as opposed to restoring it. The right place can show off your style, bring more interest to the eye, and bring out the design. The shape, size, and style of the hat, as well as the patch’s design and size, should all be considered. Eventually, excellence lies in how cautiously and finally you place your patch. Guidelines on How to Position the Patch: In the wake of knowing the ideal spot for your patch, guarantee it’s in unity with different patches, if any, to expect an uneven look. Passing designs are gone; style is everlasting, as is your patch’s situation. Iron-On Patches: An Easier Alternate Iron-on patches offer flexibility for individuals who are not gifted thread wielders. Preparing strictly and with an iron-on patch could be your answer: What Is An Iron-On Patch? This kind of patch has an adhesive backing, so you only need an iron to stick it to the fabric of your hat. You understand when and why to use it will improve your patching ability. Sewing Your Patch: A Step-By-Step Process Step 1Gather the necessary materials for sewing a patch on a hat Before you begin sewing, gather the vital materials for attaching a patch to a hat: hat, patch, Needle, thread, scissors, and pins. Having all that prepared will guarantee a smooth sewing process. step 2Pick the ideal spot to sew your patch Track down the best area on your hat to connect the patch. Explore different ways regarding various positions and briefly use pins to get the patch. Find the situation that suits your style best. step 3Set up the hat and patch for sewing Lay your hat on a neat surface and casual up the control if important. Thet the region for joining the patcguaranteed to be perfect and free from waste and debris. Check the patch for free threads or excess surfaces that could upset the sewing system. step 4Thread the Needle for sewing Thread the Needle with a shade of thread that extras the patch. Try to use a thread length two times the regular length regular. Tie a bunch toward the finish of the line to get it. step 5Start sewing the patch onto the hat With the patch fixed set up, begin sewing along one edge. Choose a whipstitch or a running stitch for a neat and professional finish. Go the Needle through the patch and hat surface, beginning from the next. step 6Guarantee a protected connection Build up the sewing by going the Needle through the surface and patching it a couple of additional times. This step will add strength

How To Sew A Patch On A Hat  Read More »

Leather Patch To Hat

how to attach leather patch to hat

How To Attach Leather Patch To Hat: A Step-by-Step Guide for Excelling at Joining Leather Patches likes a Star to Your Number One Hats! “Discover a step-by-step guide on how to attach leather patch to hat without any hassle.” Hats serve as head covers as well as materials for individual expression. Might it be said that you are prepared to take your hat game to a higher level? In this thorough guide, we’ll show you the step-by-step course of how to attach leather patch to hat. Whether you’re a design fan hoping to add a customized touch or a businessperson needing to impress your image, this blog post covers you. Find the key to a perfect connection, find out about the best instruments and procedures, and open the capability of your hat variety. Prepare to knock some people’s hits off and say something with your extraordinary hat expressions. How about we make a fall and become the best at hat patching together! Quick information in this blog Why do you need to choose a leather patch for your hat? Picking a leather patch for your hat is wise for a couple of reasons. Leather adds a tasteful and well-known touch to your hat, making it stand out. Additionally, it improves durability, extending the life of your hat. Additionally, leather patches can be modified, allowing you to impress your new style. In this way, feel free to shake that leather patch on your hat. Materials You’ll Need Before we begin, we should gather the vital materials you’ll require. With these things close by, you’re prepared to make a hat that blows some people’s minds. Leather Patch Select an excellent leather patch that increases your hat’s style. Needle and Thread Pick a strong needle and string that matches your leather patch’s shade. Scissors Guarantee exactness by having sharp sets of scissors close by. Fabric Glue (Optional) For a no-sew option, consider fabric glue for a solid connection. Step-by-Step Guide Preparing the Hat and Patch To guarantee a smooth connection, it’s critical to plan both the hat and the leather patch. Start by cleaning the hat’s outer layer and removing soil or garbage. Then, consider adjusting the hat to eliminate any current patches or stickers from the clean look. Trim any excess material from the leather patch for an ideal fit for the patch’s edges, if necessary. Attaching the Leather Patch Presently comes the exciting part: attaching the leather patch to your hat. There are two common approaches: sewing and glue. If you favor sewing, use areas of strength for a needle to join the patch onto the hat cautiously. Make a point to sew through the patch and the hat for a safe connection. If you decide to use adhesive, select a high-quality adhesive suitable for leather and fabric. Apply the glue to the back of the patch and press it fixedly onto the cap, following the producer’s directions. Finishing Touches and Care After the patch has been attached, check the hat for any loose threads. Trim them cautiously to achieve a perfect and expert look. To guarantee the life span of your hat and patch, deal with them with care. Avoid unreasonable openness to daylight or dampness, as these can harm the leather. If necessary, kindly clean the patch with a wet material. Best way to attach patches: Mix two techniques At the point when you can’t say much about which strategy to use to decide whether to sew your patch, stick it, or iron it on, Everything you can manage is a blend of two procedures. You could fix the patch at your ideal place by pressing it on and sewing it to your hat for life. By doing this, you will make 100 percent sure that your custom leather patches don’t fall. You can attempt these plans for custom hats with leather, custom leather for shirts, or custom leather patches for coats. We hope you find this blog useful, and if you need any help, please don’t pause to get in touch with us. Do think of us back, assuming you attempt any of the techniques referenced before. Conclusion: Raise Your Style with Leather Patches Becoming the best at connecting leather patches to hats permits you to fill your headwear with a hint of exclusivity and craftsmanship. You now know how to attach leather patch to hat. With these straightforward steps and helpful hints, you can transform any ordinary hat into a personalized style statement. Whether you need to feature your number 1 logo, add a bit of one-of-a-kind requests, or express your mind, this procedure opens up a universe of believable outcomes. Therefore, put on your hat, gather your supplies, and let your mind run rough. Prepare to shake a hat that mirrors your one-of-a-kind character. Now is the ideal time to release your internal hat and make heads turn anywhere. Blissful hat patching! frequently asked questions How would you apply leather patches to hats? Leather patches can be joined to hats by sewing or pasting. You can likewise use the two methods to make it stronger. How would I connect a leather patch to a hat? You can stick a patch to a hat by using paste. You can apply the paste to the back of the patch, put it on the hat, and hold it for a few moments. The patch will stick to the hat. Do you stick leather as opposed to sewing? Stick leather is the best procedure. Sewing or cutting might leave openings in the head, so the stick is your ideal choice. How might I ensure the leather patch stays set up on the hat? To guarantee a lasting connection, apply firm pressure while joining the patch, and think about involving extra sewing around the ends for additional support. Subscribe To Our Newsletter No spam, notifications only about Latest posts, updates. Share This Post With Your Friends

how to attach leather patch to hat Read More »

Patch on a Hat without Sewing

How To Put A Patch On A Hat Without Sewing

How to Put a Patch on a Hat without Sewing: A Step-by-Step Guide for the Craft of Non-Sewing Reforming your Hat Customization Hats act as something other than ornament; they are a material for self-expression. If you have a most-loved fix prepared to enhance your hat yet need sewing abilities, stress not. You can quickly and easily improve your hat game with the help of this comprehensive blog, which will take you through each step of the way. This method is quick, simple, and does not require a needle or thread. You can use it to support a cause or show off your style. Let’s learn how to put a patch on a hat without sewing and make a lasting fashion statement. Quick information in this blog Materials You’ll Need for Hat Transformation Gather the following vital materials before we embark on this journey to improve our style: Glue Velcro Patches Raise your hat with the dependability of excellent glue Velcro patches for a hold that is both secure and lasting. Rubbing Alcohol Prime your hat’s surface by cleaning it with rubbing alcohol, guaranteeing a perfect material for a flawless bond. Patch of Choice Select a patch that resounds with your style as well as coordinates flawlessly with your chosen hat. Precision Scissors Make the ideal fit by managing leftover Velcro with precision scissors, adding the last touch to your hat upgrade. Step-by-Step Style Boost Guide Clean the Hat Surface It is crucial to clean the surface to guarantee a strong bond between the patch and the hat. Just use a clean cloth and a mild detergent to get rid of any dirt, oils, or residues. Ensure the hat is dry earlier to continue on to the next stage. Position The Velcro Patches Pick a location for the Velcro patch on your hat. It very well may be the front, side, or back, depending upon your liking. Use pins or brief glue to hold the patch set up while you work. Firm and Purposeful Pressing Insert your style with reason by applying firm pressure to the patch and Velcro combination. Copy a bond that is both adhesive and transformative by pressing down with intent for approximately 30 seconds. Allow Proper Setting Time Give the adhesive a minimum of 24 hours to set and cure. Your hat will be prepared for the various adventures that lie ahead, thanks to this patient waiting period. Stability testing Delicately test the strength of your work of art by giving the patch a delicate pull. Your hat is now calm and stylish, ready to make a style statement if it stands firm. Patch Types You can use a variety of patches to decorate your fashion items, and each type may require a different attachment method. Thus, to help you with choosing which ones to get, here’s a list of them: Iron-on Patches Iron-on patches are the most helpful types to use, and they frequently come in packs, so they’re an extraordinary reason for money.If you have iron-on patches, set your iron to the proper temperature for the texture of your hat. Cover the patch with a thin cloth or parchment paper, and press the iron on top after placing it in the desired location. Heat and press evenly for the allotted time. Allow it to cool before really looking at the bond. Adhesive Patches Adhesive patches will stick to textures or surfaces without the need for sewing.If you’re using adhesive patches, strip off the support and carefully compress the patch onto the hat. To ensure a secure bond, exert firm pressure. Adhere to the directions furnished with the adhesive patches for the best outcomes. Fabric Glue Patches Fabric glue patches will be produced using fabric and connected to attire or different things using fabric glues.Apply a slight, even layer of fabric paste to the back of the patch for the fabric glue technique. Press the patch firmly onto the hat, ensuring it’s focused and adjusted. Allow the paste to dry before wearing the hat. Pin-Backing Patches These patches are easy to use and let you change, reapply, or replace them whenever you want to change things up.For instance, you can stick the pin onto the back of the patch using heated glue and have a fantastic patch in seconds by any means. Magnetic Patches These patches have solid magnets, as the name suggests. They will help you attach your patch without pin, sticking, sewing, or heat-sealing it.These patches are the easiest to remove and reattach whenever necessary, and they attach and detach from any fabric quickly and without effort. Button-Loop Patches Button-loop patches are an excellent invention! A button loop is a tiny string loop glued or sewn into the patch’s top to hang it from a button instead of being pressed or stitched onto the shirt. They make custom patches more functional and perfect, particularly as custom logos. Benefits of Adhesive Velcro Patches Reusability Velcro patches are not simply flourishes; they’re a demo of flexibility. Craft patches quickly, allowing your hat to advance with your always-evolving style. If you want to learn about How to make velcro patches click here. Preservation of Fabric Integrity Adhesive Velcro patches do not leave permanent marks on your hat, unlike sewing, which preserves the fabric’s integrity. Efficiency in Application Quick and open, this strategy requires control of sewing abilities, democratizing the specialty of style for everybody. Pro Tips for Smooth Style Success Choose the Right Surface Settle on a material that is as smooth and perfect as your style goals, guaranteeing an ideal bond and flawless completion. Follow Patch Care Instructions Like fashion, your patches increase with proper care. Adhere to really focused directions on a hat that age-like refined style. Experiment with placement With the flexibility Velcro patches offer, explore different ways regarding positions until you find the ideal spot that perfectly expresses your exceptional style. Conclusion: Unleash Your Distinctive Style You have opened the door to infinite possibilities for how to put a patch on

How To Put A Patch On A Hat Without Sewing Read More »

How to Make Sublimation Hat Patches

How To Make Sublimation Hat Patches

How to Make Sublimation Hat Patches, Step Up Your Hat Game With Do It Yourself DIY Project At Home “Discover best methods on how to make sublimation hat patches without any hassle.” In the powerful field of customized addition, sublimation hat patches stand apart as a one-of-a-kind material for self-articulation. Making your patches not only gives your hats a matchless touch, but it also lets you explore your artistic side. Sublimation is a printing process that uses intensity and strain to move color onto a surface. This comprehensive blog on how to make sublimation hat patches will take you through the step-by-step cycle of making sublimation patches, offering insights into materials, plans, and the mystifying sublimation process. So prepare to jump into the exciting universe of sublimation hat patches and figure out how to make eye-getting designs that will make your hats stick out! Quick information in this blog Why do you need to make sublimation hat patches? Making sublimation hat patches can be a surprising method for adding an individual touch to your hats and showcasing your one-of-a-kind style. Sublimation allows you to make active and dependable plans that won’t blur or strip over the long pull. By making your own sublimation hat patches, you have the chance to pick any plan, example, or picture you need, making your hats honestly stand out. What do sublimation hat patches mean? Sublimation hat patches indicate patches that are made utilizing the sublimation printing process. Sublimation is a strategy where variety is moved to texture through intensity and tension, producing stimulating plans that keep going for quite a while. As a result, sublimation hat patches, which can be applied to hats to add custom plans, logos, or workmanship, will be made using this method. They are an astonishing strategy for tuning hats and making them stand apart with energetic and solid plans. Materials You’ll Need To set out on this project, gather the fundamental tools and materials: Sublimation Printer and Ink Guarantee your printer is outfitted with sublimation ink for energetic and getting-through results. Heat Press Machine Put resources into a top-notch heat press machine to really move the sublimation ink to the texture. Sublimation Paper Use uniquely covered sublimation paper intended to hold the ink for skillful exchange onto the hat patch. Clear Hat Patches To get the top results from sublimation, choose patches made of polyester or a polyester-polyester mixture. Design Software Produce plans that are advanced and charming to the eye with visual computerization programming like Adobe Artist or Photoshop. Step-by-Step Procedure On the most proficient method to Make Sublimation Hat Patches Sublimation is a well-known procedure for making lively and long-lasting plans on different materials, including patches for hats. Here is a step-by-step technique on the most skilled method to make sublimation hat patches: Design your patch Utilize visual computerization programming to make your ideal design for the patch. Make a point to consider the size and shape that will fit well on a hat. Print the design Print the design onto sublimation paper utilizing a sublimation printer and ink. Make sure to reflect the picture prior to printing. Set up the intensity press Set your intensity press to the suggested temperature and time for sublimation. Put a Teflon sheet on the lower plate to safeguard it from any ink buildup. Position the patch Place the sublimation move paper with the plan overcoming the fixed material. Use heat-resistant tape to hold it in place. Apply intensity and strain Cautiously place the patch with the exchange paper onto the hap, guaranteeing an authentic arrangement. Close the heat press and use the recommended pressure and time, as specified by the patch material and the heat press’s instructions. Remove the transfer paper Open the heat press carefully and carefully remove the transfer paper while it is still hot after the pressing time has expired. Be careful, as the paper and patch will be hot. Allow it to cool Permit the patch to cool completely prior to taking care of it. This will guarantee that the sublimation ink sets appropriately on the patch material. Connect the patch Once cooled, you can connect the sublimation hat patch to your ideal hat utilizing either sewing or glue strategies. Conclusion: All in all, sublimation hat patches offer a phenomenal chance to release your imagination and customize your hats more than ever. With the sublimation printing procedure, you can make energetic, tough, and eye-getting plans that will make your hats really interesting. From picking the right materials to planning and applying the patches, this blog has furnished you with a step-by-step guide on how to make sublimation hat patches. Thus, feel free to communicate your style, advance your image, or basically mess around with this surprising Do-It-Yourself project. frequently asked questions What kind of printer do I need for sublimation printing? You need an Inkjet printer that is compatible with sublimation inks. Check if your printer model supports sublimation ink before buying supplies. Can I use regular printer paper for sublimation? No, you need special sublimation paper to properly transfer the ink image onto the polyester substrate using heat. Regular printer paper won’t work. How long do the hats last with sublimation patches? Sublimation patches are very durable. As long as you follow the cleaning instructions, the hats can typically last 1-2 years with proper care. Is sublimation printing safe for kids’ clothes? Yes, sublimation inks are low-toxic and non-carcinogenic when used as directed. However, it’s always best to check fabric is atleast 95% polyester for best washable results suitable for kids. How do I clean hats with sublimation patches? Hand wash in cold water using a mild detergent. Avoid bleaches or fabric softeners. Air dry away from direct sunlight to prevent fading of colors over time. How do I make sublimation hat patches with the materials I need? To make sublimation hat patches, you’ll require sublimation paper, an intensity press, sublimation ink, and polyester texture. Can I use sublimation hat patches on any kind

How To Make Sublimation Hat Patches Read More »

How to Attach PVC Patch to Hat

How To Attach PVC Patch To Hat

How to Attach PVC Patch to Hat: A Step-by-Step Guide for Excelling at Adding PVC Patches to Your Hats Like A Pro “Discover a step-by-step guide on how to attach PVC patch to hat without any error” Is it true or not that you are hoping to add a bit of personalization and style to your favorite hat? One wonderful method for completing this is by attaching a PVC patch. PVC hat patches are strong, flexible, and come in a great many designs. Whether you need to exhibit your number one gaming group, show a special logo, or express your innovativeness, attaching a PVC patch to your hat is a joking and simple do-it-yourself project. In this blog, we’ll direct you through the bit-by-bit course of how to attach PVC patch to hat, guaranteeing a safe and fancy outcome. Quick information in this blog Accumulate Your Materials Before you start attaching a PVC patch to your hat, ensure you have every one of the vital materials prepared. You’ll need these things: Materials Required Hat PVC patch Needle Scissors Pins (optional) Pick the Ideal Spot While attaching a PVC patch to your hat, choosing the ideal spot is urgent for the most extreme effect. Think about the plan and size of the patch, as well as the design of your hat. Try different things in various situations, utilizing pins or clasps to imagine the best position. Pay attention to your gut feelings and go with the spot that feels appropriate for you. Say something and let your PVC patch the beam on your hat! Set up the Patch and Hat Now that you’ve picked the ideal spot for your PVC patch, now is the right time to prepare everything for attachment. In the first place, ensure your patch is spotless and liberated from any residue or waste and trash. Position the patch on the picked piece of your hat, guaranteeing it’s focused and adjusted. Assuming you’re sewing the patch, make little aide stamps or openings on the hat where the lines will go. Assuming that you’re lean toward a glue strategy, adhere to the guidelines given. For a polished look, sew or press the patch securely onto the hat. Prepare to flaunt that fantastic patch on your hat! Position and Secure the Patch Now that you’ve prepared your PVC patch and hat, now is the right time to position and get the patch for a faultless look. Cautiously put the patch on your hat, ensuring it’s focused and lined up with your ideal spot. Use a needle and thread that are the same color as the patch or hat if you are sewing it. Start stitching from the inside of the hat, through the patch, and then back into the hat, making small, even stitches. For a cement technique, strip off the support and press the patch immovably onto the hat, applying strain to guarantee areas of strength for. Make a stride back and respect your perfectly situated and secure PVC patch on your #1 cap! Sew the Patch Okay! How about we plunge into the low-down of sewing that PVC patch onto your hat? Get a needle and string that match the shade of your patch or hat. Begin by situating the patch where you need it on your hat, then, at that point, secures it with a couple of pins. String your needle and make a bunch toward the end. Start sewing by going through the patch and hat, making little, even lines. Try to sew overall around the edges for a solid connection. Whenever you’re finished, eliminate the pins, and presto! That awesome PVC patch is now on your hat. Knot and Trim Okay! We should wrap things up and add those last contacts to your PVC patch on the hat! Subsequent to sewing the patch, make a knot toward the end of your string to get it. Trim any excess string, ensuring its slick and clean. This will give your patch a perfect and expert finish. Make a stride back and respect your workmanship. Your hat is presently shaking that great PVC patch, prepared to say something any place you go! Test and Enjoy Okay! Now is the right time to analyze your recently connected PVC patch! Wear your hat gladly, and ensure it is safely connected. To guarantee that it remains in place, give it a light tug. Presently, step out into the world and partake in the approvals and consideration your altered hat will without a doubt bring. Rock that patch with certainty and hotshot your extraordinary style and the individual touch you’ve added to your number one hat! Conclusion: All in all, we’ve covered every one of the means for how to attach PVC patch to hat. From picking the ideal patch to sewing it on safely, you currently have the information and abilities to redo your hat with style. Make sure to test the patch’s strength and partake in the consideration and praise that come your way. Your hat is currently a remarkable articulation of your character and imagination. So go on, rock that redid hat with certainty, and show the world your exceptional style! Continue to investigate better approaches to customizing your embellishments, and never be reluctant to allow your innovativeness to shine through. Blissful redoing! frequently asked questions Might I at any point attach a PVC patch to a hat? PVC patches can be joined to different sorts of hats, including baseball hats, beanies, bucket hats, and then some. Simply ensure the texture of the hat is appropriate for sewing or utilizing cement. Do I really want any extraordinary devices or materials to attach the PVC patch? Not really, on the off chance that you incline toward sewing, you’ll require a needle and string that match the shade of your patch. In the event that you settle on cement, pick serious areas of strength for a paste or sticky tape explicitly intended for attaching patches. Will putting on a patch

How To Attach PVC Patch To Hat Read More »

How To Make Velcro Patches

How To Make Velcro Patches

Discover The Art Of How To Make Velcro Patches And Craft Your Own Trendy Velcro Patches Are you curious to learn how to make velcro patches at home and add your own creativity?Well’s its not that simple, but in this blog today we will try to explain you whole process in easy and simple way. We will cover from simple steps for starters to expert tips. This blog is your go-to resource for mastering the art of making a Velcro patch. Quick information in this blog Our Step-By-Step Process Of How To Make A Patch Velcro Let’s explore our step-by-step process of how to make a Velcro patch from scratch. First let’s have a look on the material which you’ll need to make a Velcro patch. Required materials: Fabric for the base Velcro strips (both hook and loop sides) Fabric scissors Thread Fabric glue (optional) Ruler Sewing machine and needle Step-by-step process Here is our step-by-step process of how to make custom Velcro patches Step1: Design your patch The first step of making a Velcro patch is the sketching of your design. First of all sketch your design either by using software or by sketchpad. While sketching, take into consideration the size, shape and any specifications which you want to add. Step 2: Select your fabric Select the right fabric for your patch which will suit your design and need. Make sure that the fabric has durability and can withstand sewing. Cotton and polyester are good options. Step 3: Cut your fabric Carefully cut your desired shape from your fabric by using fabric scissors. Step4: Attach Velcro strips Cut Velcro strips according to the size of your patch. You can sew or use fabric glue to attach one side of the Velcro to the back of the fabric. Step 5: Design details You can also use embroidery, fabric paints and embellishments on the front of the fabric to make them more detailed and beautiful. Step 6: Sew the edges Sew around the frazzling edges of the fabric patch. You can hand-sew it with needle and thread or you can use a sewing machine. Step7: Attach the second Velcro strip Attach the second Velcro strip to the opposite side of the first one. Make sure that they align correctly. Step 8: Finishing touch Now cut the extra threads and check the patch if it has any loose edge. Furthermore, iron your patch in order to remove any wrinkle. It’s done! Your patch is ready for use! Different Types Of Patches You Can Also Try Embroidered patches Embroidered patches are the most sought-after type of Velcro patches. These patches are created by stitching the designs onto the fabric with the help of specialized embroidery machine. They have a classic appearance and feel. Moreover, embroidered patches can be made in diverse shapes and sizes. Woven patches Woven patches have a smooth and velvety texture and are made by using a loom. They are the best choice for the lightweight fabrics because they are thinner than embroidered patches. Woven patches can be made in multiple colors. They are a good option for intricate designs. PVC patches PVC patches are produced by a flexible plastic material. They are waterproof and have a great durability which makes them a popular choice for military and law enforcement applications. These patches can be made in 2D and 3D designs. You can also infuse short details and texts on them. However, they are a good choice for outdoor activities. Printed patches Printed patches are crafted by using a customized printer that transfers the designs onto the fabrics. They have silky and shinny texture and can be made in different sizes and colors. Printed patches are best option for those designs which have photographic elements. Best materials for making Velcro patches In order to learn how to make a custom Velcro patch, it is also important to make right choice for selecting the fabric. The right option ensures the durability, flexibility of your patch giving it a professional finish. Here are some commonly used materials for making Velcro patches: Cotton Canvas Cotton canvas is a preferred choice due to its sustainability and it is also easy to handle. It offers a strong base for several designs and is available in multiple colors. Polyester Twill Polyester twill is a synthetic fabric that has great durability and is resistant to wrinkles. Its smooth surface makes it suitable for complex designs. Felt Felt is also a good material for making Velcro patches. It is a smooth and thick fabric and to work with it is easy. It is preferred for its fluffy texture as well as its fabric glue absorbent ability. Denim Denim is a sturdy and durable fabric that gives a casual and robust look to a Velcro patch. It is a good choice for casual designs. Leather Leather is also used for Velcro patches which give them a classic and distinctive look. Velcro patches of leather can be embossed for customization because of having a unique texture. Polyurethane (PU) Leather PU leather is a good option for Velcro patches. It is a substitute for leather and the best option for people who want a leather-like look at competitive prices. PU leather is available in various textures and colors thus making it a versatile fabric. Water-Resistant Fabrics Waterproof fabrics are also good for Velcro patches. They are best for outdoor garments. How To Clean Velcro Patches Here are our useful instructions for how to clean a Velcro patch. Let’s have an overview of them. Firstly, detach the patch because it will ensure a more careful and thorough cleaning process. Then clean the apparent dirt and debris it will make your work easier. Use a lint roller to pick up any remaining loose particles. Fill a bowl with water and add a small amount of mild detergent. Mix it until it forms a soapy solution. Dip a soft cloth or the toothbrush into the soapy water, then gently spot clean any stains

How To Make Velcro Patches Read More »

History Of Embroidery

history of embroidery

Explore The Significant History Of Embroidery, Where Craftsmanship Meets Tradition Are you interested in knowing the fascinating history of embroidery? Then read this blog and explore the diverse history and development of embroidery. In this blog we’ll cover how and from where embroidery originated and its significance in different cultures. We’ll also see its evolution through different ages and the advancements that have taken place in the world of embroidery. Let’s dive into and find the answer of what is the history of embroidery? Quick information in this blog Discover The Early Origins And Roots Of Embroidery The history of embroidery goes way back to when people first started making fabrics. It is believed that embroidery is originated from China and the Near East. Early embroidery techniques has been traced in Cro-Magnon era or 30,000 B.C where archaeologists found preserved relics of hand-made, decorated clothes, boots and hats as well. The Chinese are acknowledged for developing some of the earliest techniques. They used silk threads in order to create intricate designs. Embroidery was highly appreciated and became a symbol of nobility and luxury.Study also shows the origins of embroidery in Ancient Egypt, Greco-Roman world and South Asia. In Egypt, archaeologists discovered the specimens of early embroidery, especially as decorative elements on clothes and accessories. Egyptians used different materials to produce embellishments. Embroidery also has strong roots in Greco-Roman civilization where the Greeks and Romans incorporated embroidery into their clothes a sign of their social status and wealth. Embroidered clothing has also been found in Europe as well, dated from 300 to 700 AD. Evolution In Embroidery Through Ages In order to know the history of embroidery, let’s have an analysis of the different ages and discover how embroidery had a different significance in each era. And explore the evolution of embroidery through these ages. Embroidery in the Medieval period In the medieval age, embroidery played very important role in the religious context. The biblical scenes and religious symbols were depicted on the clerical garments and altar clothes with the intricate embroidery. Nuns and monks used to create amazing art works in the monasteries thus making them the centers of embroidery production.In the medieval ages new stitches and techniques emerged like; chain stitch, split stitch and couching which created complex patterns and detailed designs. Moreover, they used gold and silver threads and infused gemstones to create luxurious masterpieces. Embroidery in the Renaissance period In the Renaissance, the taste and interest of people changed. Now it has become the symbol of nobility and royalty. In the Renaissance royal and noble families used to wear embroidered garments, representing their wealth and status. The opulent textiles of the Medicis in Italy, are an example of their artwork of that era.In the Renaissance, innovative and more complex stitches came into being, like stumpwork and raised embroidery. Different elements like pearls, silk and metallic threads became very popular, depicting the significance of the era. Thus embroidery became highly in demand skill among the elite class.In the 17th century embroidery became an important part of fashionable and stylish outfit. Luxurious embroidered clothes were worn by both male as well as females, having the beautiful designs on bodices, collars and cuffs. Their embroidery patterns represented their prevailing tastes and interests. Embroidery in the 18th – 20th century In the 18th century, the skill of embroidery became an important part of women’s education in the whole Europe. Learning of embroidery was considered the part of youth’s transition into adulthood and young girls were trained in the craft of embroidery. The Industrial Revolution also brought a change in the history of embroidery as it transitioned the overall history of Europe. The first embroidery machine was manufactured in France, in the middle of 1800s. These machines made the embroidery process automated, easier and faster, making it accessible for more people. Then reasonable materials were also being used in the embroidery thus losing its significance as a symbol of elite class. Rather it became accessible for common people too.In the late 20th century, embroidery was not only associated with women. The men of high social status like King of Sweden Gustaf V and Hollywood actor Henry Fonda took embroidery as their hobby. Embroidery in 21st century In this modern era, embroidery still remains an essential element of fashion and textile industry. Nowadays, experimental techniques, unconventional materials are used to create innovative designs. Now embroidery has become a source of self-expression. Moreover, advanced technologies and computerized embroidery machines are used to create intricate and detailed designs. Latest Technologies And Advancements In Embroidery After exploring the history of embroidery timeline let’s move ahead and see the advancements in embroidery. Technology has made great advancements in the history of machine embroidery. Some of them are: Computerized Embroidery Machines: The establishment of computerized machines transformed the whole industry. In order to create complex, intricate and detailed designs, these machines use digital files, offering more precision and uniformity. Digital Embroidery Software: Digital embroidery software helps designers create, editing, and digitalize intricate designs effortlessly. It gives control over stitch types, lengths, and patterns. Digital images can be imported and then can be turned into embroidery patterns. Thus it opens the options for creativity. 3D Embroidery Techniques: The advanced technology introduces the technique of three-dimensional effects in embroidery. The artists can create textured and sculptural embroidered masterpieces by skillfully handling the stitches and infusing several materials. Laser-Cut Embroidery: Laser technology is used for the precise cutting of fabrics and materials. This technology increases the efficiency and accuracy of the embroidery process. This technique is really helpful for creating intricate designs. Innovative Materials: The advanced materials have enlarged the options of embroidery. Specialty threads and fabrics, metallic threads, conductive threads for electronics and glow-in-the-dark threads offer a wide range of creative designs. Smart Embroidery and Wearable Technology: The advancement in embroidery has taken us in the world of wearable technology. Electronic components are fused with smart textiles, like sensors, conductive threads and interactive textiles through which you can respond

history of embroidery Read More »

A person holding a heart-shaped paper, part of a tutorial on making an iron-on patch.

How To Make An Iron-on Patch

Explore Our Easy-To Follow Method And Learn How To Make An Iron-On Patch For Creating Your Statement Style Initially, patches were used to repair the holes. But now-a-days their purpose has quite changed. Now patches are used to make your garment unique and different. If you are also looking for how to make an iron-on patch? No matter whether you want to repair your garment and want to give your old garment a new life with the art of crafting custom iron-on patches? At Hat patches, This blog will simplify your process and will help you in crafting eye-catching patches for your clothes. Quick information in this blog An Overview of Our Step-By-Step Techniques Of How To Make An Iron On From Fabric In order to learn How To Make An Iron-on Patch let’s see our step-by-step method of making bespoke patches. But before heading towards the method you should also be aware of the material that you’ll need for making iron-on patches. List of required Materials Fabric: Firstly, you’ll need fabric, of which you’ll make a patch. Cotton and denim are the best choice for iron-on patches. Scissors: You should have a sharp fabric scissors for precise cutting. Fusible Adhesive: You’ll also need heat-activated glue for ironing patches onto fabric. Pen or Fabric Marker: For tracing or outlining patch designs you should have a pen, fabric marker or chalk. Iron and Iron Board: In order to apply heat for adhesion, you need an iron and an iron board. Parchment Paper: To protect the fabric while ironing, parchment paper should also be available. Sewing kit: For adding durability to your patch you’ll need a sewing kit too. Ornamentation for Customizing Patches If you want to customize your patch then you need these additional embellishments which will make your patch more attractive and charming. Beads and Sequins: Beads and sequins adding a texture and sparkle to your patches. Fabric Paints or Markers: You can use fabric paints and markers for a detailed design and attractive colors. Embroidery Floss: In order to enhance patches with intricate stitching you should have embroidery floss. Patches of Different Textures: If you want to customize you patch then you can use patches of different textures like felt, velvet and other unique fabrics. Buttons or Appliqués: Buttons and appliqués are used for decorative purpose. Glitter or Metallic Sheets: To create an eye-catching effect, you should use glitter or metallic sheets. Our step-by-step method Let’s move forward and scrutinize our step-by-step method of how to make an iron-on patch. Step1: Prepare materials and your workplace First of all, gather all materials as mentioned before. Set your iron board and your workplace. Then preheat your iron according to the fusible adhesive instruction. Step2: Cut and shape your fabric After you have set up your place, cut the fabric according to your desired shapes and sizes with a sharp fabric scissors. Use a template or draw the design directly onto the fabric for more precision. Step3: Apply fusible adhesive and assembling your Patch Place the backside of the patch on the iron stand. Follow the instructions on the packing of the fusible adhesive package and apply it to the backside of the fabric. After applying adhesive, you can place an additional layer for the embellishments if you want to customize your patch. Then assemble it and cover with parchment paper to protect the fabric and iron over it. Allow it to cool. Step4: Customization Options and Embellishments For customized patches you can use several ornaments such as painting, embroidery, adding beads, or using fabric markers.You should experiment with textures, colors, and designs to achieve the desired look for your patch. Step5: Iron On the Patch to the garment Spread your garment and decide the place where you want to attach it or where it suits you. Place the prepared patch onto the fabric in the desired place, putting the adhesive side down. Finally, cover the patch with parchment paper and iron over it, applying firm pressure for the recommended duration. Allow the fabric to cool before handling and make it sure that the patch is attached completely. This detailed guide breaks down each step involved in creating iron-on patches, from preparing materials to customizing designs and finally adhering the patches onto clothing or fabric. Tips for the Perfection Your Iron-On Patches Sometimes iron on patch can cause some issues or problems, so here are our tips for you. They will help you in tackling these issues and will also help you in perfection. Adhesive Not Sticking: If your patch isn’t attaching completely, then apply the heat once again with proper pressure on high speed and also increase the duration. You should also check if there is any wrinkle or debris because they can problem in adhesion as well. Uneven Adhesion: To avoid uneven adhesion ensure the even apply of iron of the whole patchy area. Apply iron with gentle and consistent pressure. How to maintain and wash garments with Iron-On Patches Wash Inside Out: In order to save your patch, turn the garment inside out before washing it. Use mild Detergent: Always use mild detergents for an iron on patch, because harsh detergents can cause damage or discoloration of your patch. Gentle cycle: To prevent the damage always give it a gentle washing cycle. Air Dry: To maintain the durability of your iron on patch air dry your clothe. Our Creative Ideas for Different Patch Designs and Styles Embroidered Patches: Experiment with different embroidery stitches to create intricate designs. Theme-Based Patches: Design patches around specific themes like nature, animals, or favorite quotes for a cohesive collection. Layered Patches: Combine multiple patches to create depth and uniqueness. Custom Shapes and Sizes: Play with various shapes and sizes to suit different clothing items. Mixed Media Patches: Incorporate various materials like fabric, beads, or buttons for a multidimensional effect. These detailed tips aim to troubleshoot common issues, provide guidance on maintaining garments with iron-on patches, and offer creative ideas for designing a

How To Make An Iron-on Patch Read More »

Remove Iron On Patches

How To Remove Iron On Patches

How To Remove Iron On Patches? Here Is The Best Method You Need To Know Iron on patches is a popular choice for adding a charm to your garment. But with the passage of time our preferences change and sometimes we want to reuse it. For this reason, you may need to remove the patch. If you are alo looking to learn how to remove iron on patches without any damage? Then you caught the right place! To remove an iron on patch requires the right approach and effective techniques because wrong methods and improper techniques can lead you to the unwanted consequences. But don’t worry! In this blog you’ll get the best, easy, right and effective methods of removing iron on patches. Quick information in this blog Explore Our Expert Methods And Techniques Of How To Remove An Iron On Patch There are different methods of how to remove iron-on patch glue from fabric.Let’s have an overview of the easiest and safest one. Method#1: By heating and peeling First of all, set your iron on a low or medium temperature. Cover your badge with a clean cloth in order to protect the nearby area. You can also use parchment to cover it. To warm up the adhesive gently apply the iron on your patch for almost 20 seconds. When it is warm try to peel it off. If it does not remove, then try it again. Method# 2 By freezing Put your clothes in a plastic bag and seal it. Then place it in the freezer for some hours or overnight. The cold temperature will make the adhesive fragile and easier to remove. Take out your bag from the freezer and immediately peel off the patch. Method# 3: By using adhesive removers Use a mild adhesive remover that won’t damage your fabric. It is better to test on a small area or on the rough cloth. Apply some remover on it and let it for a few minutes. Turn your cloth inside to expose the fabric behind the patch. Soak the back of the patch into the adhesive remover. Leave it for a few minutes till the patch loosens. Check it by peeling off the corner, if it is removed then peel it off slowly. If it doesn’t remove properly then repeat the process until it’s removed completely. Method# 4: By soaking in hot water For this method, you need a small container or you can use a sink too. Put some hot water in your container. Then soak your garment into the water and leave it for around 20 minutes. Now gently rub your patch with your hands and you can also use a soft bristled brush. It will loosen the patch, remove your patch, and then rinse it. Method # 5 By using a hair dryer Firstly, set your hair dryer on high heat. Hold the hair dryer to the backside of the patch. Then turn it on and blow dry the patch until the adhesive is heated up. After heating it up try to remove it smoothly. If it does not leave its place, then repeat the procedure and remove it completely. When the patch is removed you can also use any adhesive remover to the remaining glue. Method # 6 By soaking in vinegar Using vinegar is a great remedy for removing stubborn stains and removing glue. For this method you are to make a solution by taking vinegar and water in the same quantity. After making the solution put your patch area into the solution. Soak it overnight, it will soften the patch. Check it the next day and remove it. If it doesn’t peel off easily then you can some tool and rub it gently, it will be removed. How To Remove Iron On Patch From Leather? You can’t use all methods on all types of fabric, because all have different texture and durability. For example, you can’t apply heat on leather for removing an iron on patch because it can damage it. That’s why you need the right guidance and instructions for removing an iron on patch adhesive. Let’s see how to remove iron on patch from leather. If you want to Look up our leather hat patches. Step 1: Use leather-safe adhesive remover A leather-safe adhesive remover contains basic ingredients like orange oil or xylene-based. The liquid adhesive removers are preferred because you can soak your patch thoroughly. Step 2: Expose the backside of the patch The second step is to turn your garment and expose the inside of the patch, making sure the position of the patch. Step 3: Soak the patch area thoroughly into the adhesive remover Pour the adhesive remover on the backside of the iron-on patch. Use gloves while using adhesive removers to protect your skin. You can also use dropper or spoon for pouring the remover. Soak the whole backside of the patch into the remover thoroughly. Let it loosen the patch, after that remove it properly. How To Remove Iron On Patch Glue From T-Shirt? If you want to remove an iron on patch from uniform, then follow these steps and remove your patch without damaging it. Use nail polish remover Nail polish remover can do wonders; you can use it for removing an iron on patch. Nail paint remover contains acetone acid, breaking down the glue from an iron-on patch. Before using nail polish remover it’s suggested to test it on a small or invisible area. Take some cotton and dip it in the nail paint remover. Make sure the cotton is completely soaked in acetone. Apply the remover on the patch and let it loosen. After it gets loosen; remove it gently. Repeat the steps until the patch is completely removed. How To Remove Iron On Patch Adhesive From Jerseys? Before you pop out with a similar question like how to remove a iron on patch from jerseys, we are right here to get you to introduce some different and practical methods.

How To Remove Iron On Patches Read More »

How to Put a Patch on a Hat

How to Put a Patch on a Hat

Dive into our step-by-step guide on how to put a patch on a hat and let your creativity soar. Hats have a rich historical significance, symbolizing various roles, statuses, and identities in societies worldwide. Throughout history, hats have been used as a means of self-expression. Beyond fashion statements, hats serve practical purposes. If you want to know how to put a patch on a hat, whether you are a beginner, in search of ideas and creative methods, or want to fix or cover the holes and imperfections on your hat. Join us in this journey of patching a hat and redefining your style effortlessly. Quick information in this blog Let’s explore the process of sewing a patch on a hat and its required materials. Required Materials: Hat: Firstly choose a hat upon which you want to put a patch. Patch: Select a patch that complements the hat’s style and material. And also consider the size of the patch. Needle and Thread: If you select the sewing method then pick a thread that matches the patch and hat color. Adhesive: If you want to use adhesive patches, ensure it is suitable for fabric. Scissors: You also need scissors for trimming threads or excess fabric. Iron and Ironing Board: This material is needed for iron-on patches. Fabric Glue (optional): In case of sewing or ironing it isn’t suitable for your patch or hat material. Process of putting a Patch on a Hat: Preparation: Clean and Hat: Ensure the hat surface is clean and dry. Use a lint roller or gentle soap and water to remove any dirt or dust. Let it dry completely. Placement: Decide place: Position the patch on the hat to visualize where you want it. Consider the style and balance of the hat. Common placements include the front, side, or back. Thread selection: In the sewing method, choose a thread color that matches the patch or the hat for a subtle or contrasting effect. Securing the patch: Thread the needle and start sewing from the back of the patch. Stitch along the edges or through the patch’s perimeter and the hat, ensuring a secure attachment. Knot the thread at the back after sewing around the patch. Heat the iron: If you use the iron-on method, set the iron to the appropriate heat level for the hat material (consult the patch instructions for heat recommendations). Position the patch: Place the patch on the desired spot. Cover it with a thin cloth or parchment paper to protect the patch and hat from direct heat. Ironing: Press the iron on the patch area for the recommended time, applying even pressure. Avoid using steam. Allow it to cool before checking the bond. Patch adhesive: In adhesive technique, follow the instructions on the adhesive patch. Typically, you’ll peel off the backing and press the patch firmly onto the hat, ensuring it adheres evenly. Finishing Touches: Trim excess thread and fabric: If sewing, trim any excess threads. If needed, trim any extra fabric around the patch for a clean finish. Allow proper bonding: Whether sewing, ironing, or using adhesive, allow sufficient time for the patch to bond securely to the hat. Optional Embellishments: Personalize further: Consider adding additional embellishments like beads, sequins, or embroidery around the patch to enhance its visual appeal (if desired). Different methods of attaching a patch on a hat. There are several methods to attach patches to hats, each offers its own benefits and considerations: Sewing Method: Sewing is the most strong and long-lasting solution if you are looking to know how to sew patches on a hat and want long-term results and save your hat from damage then sewing is the best option but it requires a little skill. Moreover, there are two options in the sewing method:1. Hand sew2. Use a sewing machineUsing sewing machine is the most robust, but it is your choice which one you want to use. If you have expertise in hand sewing then you can do a good job.If you want to sew your patch by hand, then let’s have a look on our step-by-step guide on how to hand sew a patch on a hat. Hand sews: Step 1: First of all decide the position where you want to put your patch. Once, position is selected then pin it in place.Step 2: Then, glue the patch in position on the hat. This will help in positioning the right place and not let it change location while you’re sewing.Step 3: Select a thread, matching to the color of your patch and hat. Then have a heavy-duty needle and after threaded, tie a knot at the end to prevent the thread from getting loose.Step 4: Next, place your thimble on either your right or left-hand middle finger (whichever is dominant). Then turn your hat inside out and start sewing the patch, using your thimble finger.Step 5: Don’t get carried away while pulling the needle through the hat and patch; take it slow. This way, you minimize the likelihood of tangles or the thread snapping halfway through.Step 6: Sew around the edges of the patch until it is securely attached. Then, cut the thread and tie a knot. Make sure that the knot is inside of the hat then it will be invisible while wearing. Using a sewing machine: Using a sewing machine is slightly more complicated than by hand but it is a feasible option, resulting in a stronger attachment. Here are some steps of using a sewing machine for patching a hat:Step 1: First of all, use either pins or glue to fix your patch on the selected position, on your hat. Tape can also be used for this purpose, the choice is yours.Step 2: Match the thread to the color of your hat then thread the needle on your sewing machine and set the necessary stitch length.Step 3: Once set up, start stitching the edges of the patch for a secure attachment. Try to use the narrowest possible zig-zag setting . Step

How to Put a Patch on a Hat Read More »

error: Content is protected !!

HATS PATCHES